
Substrate — the material covering the bottom of your tank — is one of those decisions that feels bigger than it is when you’re starting out. Walk into the choice cold and you’ll find expensive specialty products, cheap bags of gravel, fine sands, and a lot of strong opinions, and it’s easy to assume you need to agonize over it. Good news: for a low-tech Neocaridina tank, the substrate choice is genuinely simple, and the cheaper option is usually the right one.
Let me explain the real difference between the two main types, which one suits your shrimp, and how to avoid the one substrate mistake that actually matters.
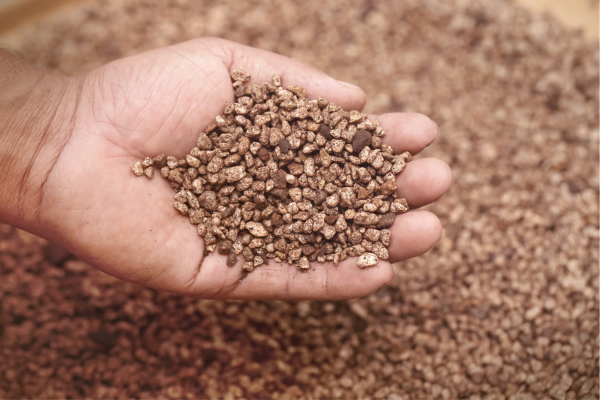
What substrate actually does
Before choosing, it helps to know what the stuff on the bottom is even for, because it does more than look nice. Substrate gives your plants something to root in, provides a massive surface area for beneficial bacteria to colonize, and creates the grazing ground where your shrimp spend most of their day picking at biofilm and detritus. It’s not just decoration — it’s part of the tank’s biological system.
But here’s the key insight for a low-tech shrimp tank: most of the plants you’ll be using don’t even root in the substrate. Java moss, Anubias, Java fern, Bucephalandra — the low-tech shrimp staples — all attach to rocks and wood instead of planting in the ground. That single fact dramatically simplifies your substrate decision, because you’re not choosing a substrate to grow demanding rooted plants. You’re choosing one that’s good for shrimp.
The two types: inert vs. active
Substrates for planted and shrimp tanks fall into two broad camps, and understanding the difference is the whole decision.
Inert substrate is material that doesn’t change your water chemistry — plain gravel and sand are the classic examples. It just sits there, providing surface area and a grazing surface without altering anything about your water. It’s stable, cheap, lasts essentially forever, and doesn’t need replacing.
Active substrate (often called “buffering” or “aquasoil”) is designed to actively change your water chemistry — specifically to lower the pH and soften the water. It’s made for shrimp that need soft, acidic water, and it’s also nutrient-rich for demanding rooted plants. It’s more expensive, and crucially it has a limited lifespan: its buffering ability gradually exhausts over a year or two, after which it needs replacing.
For most people, that difference points clearly in one direction.
Why inert substrate wins for Neocaridina
Here’s the thing that makes this easy: Neocaridina shrimp — your Cherries, Blue Dreams, and the rest — actually prefer neutral to slightly hard water. They are not soft-water shrimp. The whole point of active, pH-lowering substrate is to create the soft, acidic conditions that a different group of shrimp needs.
So for Neocaridina, active substrate isn’t just unnecessary — it can actively push your water in the wrong direction. You’d be paying more for a product designed to create conditions your shrimp don’t want.
Plain inert gravel or sand, by contrast, keeps your water stable and unchanged, which is exactly what Neocaridina want. It’s cheaper, it lasts forever, it never needs replacing, and it provides all the surface area and grazing ground your shrimp need. For a low-tech Neocaridina tank, inert substrate is the sensible, economical, and frankly better choice. This is one of those happy cases where saving money and making the right call are the same decision.
The exception, just so it’s clear: if you were keeping Caridina shrimp like Crystal Reds, which genuinely need soft acidic water, active substrate would be the right tool. But Caridina aren’t beginner shrimp, and if you’re reading this you’re almost certainly keeping Neocaridina — so inert it is.
Gravel or sand?
Once you’ve settled on inert, you’ve got a minor choice between gravel and sand, and honestly either works fine. It comes down to preference and aesthetics more than shrimp welfare.
Fine sand gives a clean, natural look and shows off shrimp colors nicely, but very fine sand can compact over time. Gravel allows good water flow through it and is very easy to work with, though debris can settle down into larger gaps. Many keepers like a fine gravel or a coarse sand as a middle ground. None of these will make or break your tank — pick the look you prefer.
One genuinely useful aesthetic tip: a darker substrate tends to make shrimp colors pop more vividly. Shrimp can subtly adjust their coloration to their surroundings, and against a dark bottom, reds and blues often look richer and more saturated than they do against bright, pale gravel. If vivid color is part of why you’re keeping shrimp, leaning darker is an easy win.
The substrate mistake that actually matters
Most substrate “mistakes” are harmless preferences, but there’s one real error worth flagging: not rinsing your substrate before adding it. New gravel and sand are often dusty, and if you pour them straight into the tank and fill it, you’ll get a frustrating cloud of fine particles that can take ages to settle and may clog things up.
The fix is simple. Rinse your substrate thoroughly in plain water — no soap, ever — before it goes in the tank, until the water running off it is mostly clear. It’s a slightly tedious job, but it saves you days of cloudy water at the start. While we’re here: cloudy water after setup is usually a different, harmless phenomenon related to the tank establishing itself, but cloudy water from unrinsed dusty substrate is avoidable, so rinse first.
Putting it in the tank
When you set up, the substrate goes in first, after rinsing. A gentle slope rising toward the back can add a sense of depth, though in a small nano tank it’s a minor touch. Then comes your hardscape — rocks and wood — and your plants attached to that hardscape. Because your low-tech plants attach to the hardscape rather than rooting in the ground, you don’t need a deep substrate bed; a modest layer is plenty.
From there, you fill slowly to avoid disturbing everything, start your filter, and begin the cycling process that gets the tank ready for shrimp.
The bottom line
For a low-tech Neocaridina tank, skip the expensive active substrate — it’s built for soft-water shrimp your Cherries and Blue Dreams aren’t — and go with plain inert gravel or sand. It’s cheaper, lasts forever, keeps your water stable in exactly the way Neocaridina like, and provides all the grazing surface your shrimp need. Lean darker if you want richer colors, rinse it well before it goes in, and you’re done.
It’s one of the easiest decisions in the setup, which is a relief, because it lets you put your real attention on the step that matters most: cycling the tank properly before any shrimp arrive, covered fully in the step-by-step guide to cycling a nano shrimp tank.
