
The honest answer is “less than you fear, but more than the cheapest thing you saw online.” Somewhere people get the idea that a shrimp tank is either nearly free or wildly expensive, and the truth sits in a comfortable middle. So let me actually break it down — piece by piece, with the real reasons some costs are worth it and others aren’t — so you know what you’re getting into before you spend anything.
I’ll split this into what you genuinely need, what’s optional, and where people waste money. By the end you’ll have a realistic budget for your situation instead of a vague guess.
The essentials: what you can’t skip
These are the non-negotiables. Skimp here and you’ll pay for it later in dead shrimp or a tank you abandon.
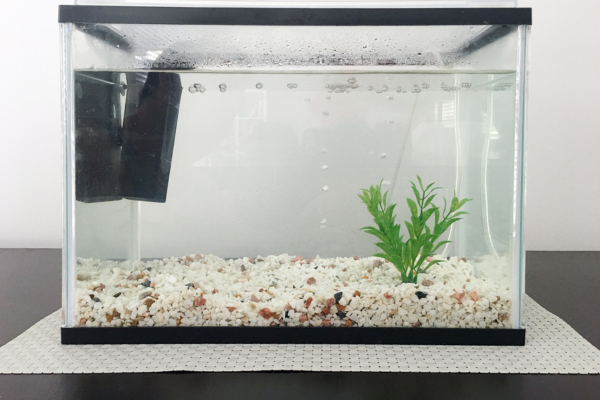
The tank itself. A small nano tank in the right size range is the foundation, and it’s usually one of the larger single costs. The temptation is to grab the smallest, cheapest one — resist it. A slightly bigger tank is more stable and more forgiving, and the price difference between a too-tiny bowl and a sensible small tank is modest. This is money well spent.
A sponge filter and air pump. This is the low-tech workhorse, and it’s genuinely cheap — one of the least expensive things on the list. A sponge filter plus a small air pump and some airline tubing covers your filtration completely. You don’t need anything fancier, and for shrimp you actively want this gentle option rather than a pricier powered filter.
Substrate. For Neocaridina shrimp, plain inert gravel or sand works fine and costs little. You don’t need the expensive “active” substrates sold for high-tech tanks. This is a place to spend less on purpose.
A liquid water test kit. Here’s the one people skip to save money, and it’s the worst possible place to cut. A liquid test kit isn’t the cheapest item, but it’s the tool that tells you whether your tank is safe — it’s how you “see” the ammonia you can’t see with your eyes. Buying everything else and skipping this is like buying a car and skipping the brakes. Get the kit.
A bottle of dechlorinator. Cheap, lasts ages, and essential for treating tap water before it goes near your shrimp. A small expense you’ll barely think about.
Add those up and you have a complete, working, shrimp-safe setup. That’s your real baseline cost — and the tank and the test kit are the two pieces carrying most of it.
The plants and the shrimp
Two more costs that aren’t “equipment” but are part of starting.
Plants are inexpensive, especially the easy low-tech ones a shrimp tank wants. A clump of Java moss and an Anubias or two will get you started, and they’re cheap precisely because they’re hardy and common. Even better, they grow and spread, so the initial small outlay is the only one — your tank fills in for free over time.
The shrimp themselves are usually one of the smaller costs, which surprises people. A starting colony of Neocaridina is affordable, and because they breed readily, you’re really only buying them once. Buy a modest starting group rather than overstocking — they’ll multiply on their own, so paying for a big crowd up front is just spending money the shrimp will happily make for you later.
The optional stuff
None of these are required, but some are worth considering depending on your situation.
A heater is only necessary if your room regularly drops below the high teens Celsius. Neocaridina handle normal room temperature fine, so many desk keepers skip the heater entirely and save the cost. Buy it only if your room is genuinely cold.
A light is nice for seeing the shrimp clearly and keeping plants happy, but it’s flexible. A dedicated small tank light is inexpensive, and in a pinch even a clip lamp works. Treat this as a modest, optional add rather than a core cost.
A lid or cover cuts evaporation and keeps dust out. Cheap, useful, but not strictly essential — your call.
A remineralizer is worth a mention: if your tap water is very soft, you may need to add minerals so shrimp can molt properly. It’s a small cost, but check your water’s hardness first — many people don’t need it at all.
Where people waste money
Now the part that actually saves you cash — the spending traps.
The biggest one is buying high-tech gear you’ll never use. CO₂ kits, powerful canister filters, elaborate multi-stage lighting — none of it belongs in a low-tech shrimp tank, and some of it actively causes problems. The market is very good at selling features. For this hobby, simpler is both cheaper and better.
The second trap is the all-in-one kit with the wrong filter. Kits bundle everything in one box for convenience, but the included filter is often a powered intake that endangers baby shrimp, meaning you’ll buy a sponge filter anyway and pay twice. Sometimes a kit is a fine deal — just check what filtration it comes with before assuming it saves money.
The third is going too small to save a few coins. A tiny bargain bowl is harder to keep stable, and an unstable tank costs you in replacement shrimp and frustration. The cheaper tank is often the more expensive decision.
So what’s the realistic total?
Rather than quote a single number that’ll be wrong for your country and choices, here’s the honest shape of it: the tank and the test kit are your two biggest items, filtration and substrate are cheap, plants and shrimp are modest, and the optional extras depend entirely on your room and preferences. A sensible low-tech nano setup is an affordable hobby to enter — far cheaper than most tech gadgets — and the ongoing costs afterward are tiny: a bit of food, the occasional water treatment, and that’s about it.
The smartest way to budget is to buy the essentials properly and skip the optional and high-tech stuff until you actually know you need it. Spend where it counts — a sensible tank and a real test kit — and save everywhere else. You can always add a light or a heater later; you can’t easily undo dead shrimp from a setup that was missing the basics.
If you want to see exactly how these pieces come together into a working tank, the complete beginner’s guide to low-tech nano shrimp tanks walks through the whole setup from empty glass to thriving colony.
