
If there’s one piece of equipment I’d never let a shrimp keeper skip, it’s a water test kit — and yet it’s the thing beginners most often try to do without, usually to save a little money. That’s a costly mistake, because a test kit is the only way to “see” the invisible things that actually kill shrimp. The good news is that choosing one is simple once you understand what you’re testing for and what separates a reliable kit from a useless one. Let me walk you through how to pick the right test kit and why it matters so much.
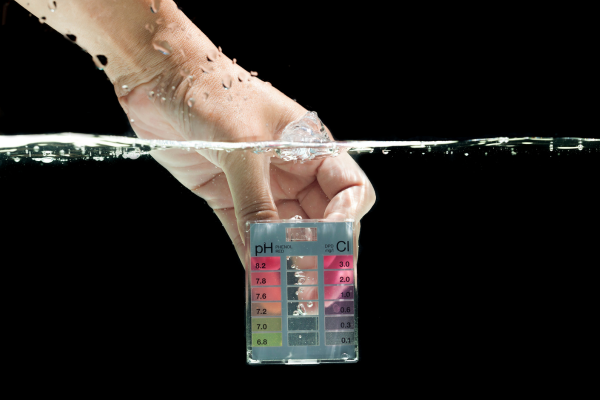
Why a test kit is non-negotiable
Start with the why, because it reframes the whole purchase. The things most likely to harm your shrimp — ammonia and nitrite — are completely invisible. You cannot see them, smell them, or judge them by how clear the water looks. A tank can be crystal clear and lethally toxic at the same time. The water test kit is the instrument that makes these invisible dangers visible, turning guesswork into actual information.
This is why skipping the test kit is like buying a car and skipping the brakes. Everything else you buy keeps shrimp comfortable; the test kit keeps them alive by letting you confirm the water is safe. It’s also essential during cycling, where you literally cannot know your tank is ready for shrimp without testing. So the test kit isn’t optional gear — it’s core safety equipment.
Liquid kits vs. test strips: the one big decision
The single most important choice you’ll make is between liquid test kits and test strips, and for shrimp keeping the answer is clear: get a liquid kit.
Test strips are the paper strips you dip in the water and compare to a color chart. They’re convenient and cheap, but they’re notoriously imprecise — the colors are often hard to read, results can be vague, and they tend to be less accurate overall. For something as critical as confirming ammonia is at zero, “vague” isn’t good enough. You’ll second-guess every reading.
Liquid test kits involve adding drops of reagent to a small vial of tank water and comparing the resulting color to a chart. They take a couple of extra minutes, but they’re substantially more accurate and reliable, giving you clear, trustworthy readings you can actually act on. For the precision shrimp keeping demands — especially confirming those critical zero readings — liquid kits are the standard, and the small extra effort is entirely worth it.
So whatever else you decide, choose a liquid-based kit over strips. This one choice matters more than any brand difference.
What the kit actually needs to test
Not all the parameters matter equally, so here’s what a good shrimp-keeping test kit should let you measure, roughly in order of importance.
Ammonia and nitrite are the critical safety parameters — both toxic, both needing to read zero in a healthy tank. Any kit you choose must cover these, because they’re what you watch during cycling and what you check when something seems wrong. These are the non-negotiables.
Nitrate is the relatively harmless end product of the cycle that you keep low through water changes. Testing it tells you whether your water change routine is keeping pace, so it’s well worth having.
pH is useful for confirming your water sits in the comfortable range for shrimp and, more importantly, for confirming it’s stable over time. Shrimp aren’t fussy about exact pH, but a kit that measures it helps you spot unwanted swings.
GH and KH — general and carbonate hardness — are especially valuable for shrimp keepers, because GH is the parameter most directly tied to whether shrimp can molt properly. Many general kits don’t include hardness tests, so this is worth checking for, or buying a separate GH/KH test to go alongside your main kit. Given how important GH is to shrimp survival, having a way to measure it is genuinely important.
A kit covering ammonia, nitrite, nitrate, and pH covers the essentials; adding GH and KH testing covers shrimp keeping properly.
What to look for in a good kit
Beyond the parameters, a few practical qualities separate a kit you’ll actually use from one that frustrates you.
Look for clear, distinguishable color charts — the whole system relies on matching your result to a reference color, so charts with steps that are easy to tell apart make your readings more reliable. Look for enough reagent for plenty of tests, since a good liquid kit should last a long time and bring the per-test cost right down, making the initial price very reasonable over time. And favor a kit with a reasonable shelf life and clear instructions, so your readings stay trustworthy and the process stays simple.
You don’t need anything elaborate or expensive. A solid, standard liquid kit covering the key parameters is all a shrimp keeper requires — sophistication isn’t the goal, reliability is.
How to use it well
A test kit only helps if you actually use it sensibly, so a quick word on that. During cycling, test frequently — every couple of days — to follow the cycle’s progress and confirm when the tank is finally safe for shrimp. In an established, stable tank, you don’t need to test obsessively; a periodic check plus testing whenever something seems off is plenty. The kit is there to give you information when you need it, not to create a daily chore.
Learning to read your kit accurately — in good light, against a white background, comparing colors carefully — makes your results far more useful. With a little practice, testing becomes a quick, routine habit that gives you real confidence about your water.
The bottom line
A water test kit is the one piece of equipment no shrimp keeper should skip, because it’s the only way to see the invisible ammonia and nitrite that actually kill shrimp. When choosing, the key decision is simple: pick a liquid kit over test strips for the accuracy shrimp keeping demands. Make sure it covers ammonia, nitrite, nitrate, and pH at minimum, and ideally add a way to measure GH, since hardness is so central to healthy molting.
You don’t need anything fancy or costly — just a reliable liquid kit you’ll actually use, during cycling and whenever something seems off. It’s core safety gear, every bit as important as the tank itself, and it fits into the wider set of sensible equipment choices covered in the guide to choosing a nano tank for your desk.
